一、生产者整合
1.创建生产者SpringBoot工程
2.引入依赖
在pom文件加入以下依赖
<!--1.父工程依赖-->
<parent>
    <groupId>org.springframework.boot</groupId>
    <artifactId>spring-boot-starter-parent</artifactId>
    <version>2.1.4.RELEASE</version>
</parent>

<dependencies>
    <!--2.rabbitmq依赖-->
    <dependency>
        <groupId>org.springframework.boot</groupId>
        <artifactId>spring-boot-starter-amqp</artifactId>
    </dependency>
    <dependency>
        <groupId>org.springframework.boot</groupId>
        <artifactId>spring-boot-starter-test</artifactId>
    </dependency>
</dependencies>
3.编写yml配置,基本信息配置
在resources文件夹下创建application.yml文件
spring:
  rabbitmq:
    host: 10.147.17.158  #IP主机名
    port: 5672  #端口
    username: guest #用户名
    password: guest #密码
    virtual-host: /
如果没有启动类,则需要先创建一个Springboot启动类: ProducerApplication
package com.ailuti;

import org.springframework.boot.SpringApplication;
import org.springframework.boot.autoconfigure.SpringBootApplication;

@SpringBootApplication
public class ProducerApplication {
    public static void main(String[] args) {
        SpringApplication.run(ProducerApplication.class);
    }
}
4.定义交换机,队列以及绑定关系配置类
创建一个RabbitMQ配置类:RabbitMQConfig,完成以下代码
package com.ailuti.rabbitmq.config;

import org.springframework.amqp.core.*;
import org.springframework.beans.factory.annotation.Qualifier;
import org.springframework.context.annotation.Bean;
import org.springframework.context.annotation.Configuration;

@Configuration
public class RabbitMQConfig {
    public static final String exchange_name = "boot_topic_exchange";  //交换机名称
    public static final String queue_name = "boot_queue";  //队列名称

    // 1.交换机
    @Bean("bootExchange")
    public Exchange bootExchange(){
        return ExchangeBuilder.topicExchange(exchange_name).durable(true).build();
    }

    //2.queue队列
    @Bean("bootQueue")
    public Queue bootQueue(){
        return QueueBuilder.durable(queue_name).build();
    }

    //3. 队列和交换机绑定关系 Binding

    /**
     * 1.知道哪个队列
     * 2.指定哪个交换机
     * 3.routingKey
     * @return
     */
    @Bean
    public Binding bingingQueueExchange(@Qualifier("bootQueue") Queue queue, @Qualifier("bootExchange") Exchange exchange){
        return BindingBuilder.bind(queue).to(exchange).with("boot.#").noargs();
    }
}
5.注入RabbitTemplate,调用方法,完成消息队列
创建一个Test测试类ProducerTest,完成发送消息测试
package com.ailuti.test;


import com.ailuti.rabbitmq.config.RabbitMQConfig;
import org.junit.Test;
import org.junit.runner.RunWith;
import org.springframework.amqp.rabbit.core.RabbitTemplate;
import org.springframework.beans.factory.annotation.Autowired;
import org.springframework.boot.test.context.SpringBootTest;
import org.springframework.test.context.junit4.SpringRunner;

@SpringBootTest
@RunWith(SpringRunner.class)
public class ProducerTest {

    @Autowired
    private RabbitTemplate rabbitTemplate;

    @Test
    public void textSend(){
        rabbitTemplate.convertAndSend(RabbitMQConfig.exchange_name,"boot.xxxx","boot mq test hello....");
    }

}
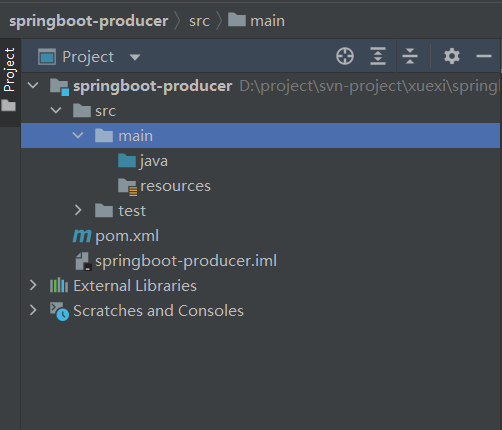
项目目录结构如下

运行test测试类,然后返回rabbitMQ页面,出现刚刚创建的队列代表生产者创造成功

二、消费者整合
1.创建消费者SpringBoot工程

2.引入依赖
<!--1.父工程依赖-->
<parent>
<groupId>org.springframework.boot</groupId>
<artifactId>spring-boot-starter-parent</artifactId>
<version>2.1.4.RELEASE</version>
</parent>

<dependencies>
<!--2.rabbitmq依赖-->
<dependency>
<groupId>org.springframework.boot</groupId>
<artifactId>spring-boot-starter-amqp</artifactId>
</dependency>
<dependency>
<groupId>org.springframework.boot</groupId>
<artifactId>spring-boot-starter-test</artifactId>
</dependency>

</dependencies>
3.编写yml配置,配置基本信息
在resources文件夹下创建application.yml文件
spring:
  rabbitmq:
    host: 10.147.17.158  #IP主机名
    port: 5672  #端口
    username: guest #用户名
    password: guest #密码
    virtual-host: /
如果没有启动类,则需要先创建一个Springboot启动类: ProducerApplication
package com.ailuti;

import org.springframework.boot.SpringApplication;
import org.springframework.boot.autoconfigure.SpringBootApplication;

@SpringBootApplication
public class ProducerApplication {
    public static void main(String[] args) {
        SpringApplication.run(ProducerApplication.class);
    }
}
4.定义监听类,使用@RabbliListenter注解完成队列监听
创建一个RabbitMQListener类,完成以下代码
package com.ailuti.rabbitmq.config;


import org.springframework.amqp.core.Message;
import org.springframework.amqp.rabbit.annotation.RabbitListener;
import org.springframework.stereotype.Component;

@Component
public class RabbitMQListener {

    @RabbitListener(queues = "boot_queue") //生产者创建的队列名称
    public void ListenerQueue(Message message){
        System.out.println(message);
    }

}
然后运行启动类,控制台成功接收Queue发送的消息,代表成功

三、总结
- SpringBoot提供了快速整合RabbitMQ的方式
- 基本信息在yml中配置,队列和交换机以及绑定关系在配置类中使用Bean的方式配置
- 生产者直接使用RabbitTemplate完成消息发送
- 消费者直接使用RabbitListener完成消息接受
代码下载:springboot-rabbitmq

文章评论